Featured image of post Bypass China's Internet Censorship: Using Caddy to Reverse Proxy VLESS

Bypass China's Internet Censorship: Using Caddy to Reverse Proxy VLESS

Caddy's automatic TLS is an absolute delight to use.

In the previous article, I mentioned that I set up a BT offline download server based on Aria2. To deploy the container with Caddy as a reverse proxy, I uninstalled the Trojan that I had lazily deployed using a one-click script before. The reason is simple: the script occupied ports 80 and 443, making it impossible to continue without uninstalling it.

So, the offline download server was set up, but the proxy that was occasionally needed had to be taken offline. After some thought, I recalled seeing someone revive a blocked VPS using Cloudflare + V2Ray + WS. Since it’s WebSocket, it can be reverse proxied by Cloudflare, so why not use Caddy? Moreover, Caddy has automatic TLS, which is certainly easier to configure than the Nginx + Certbot combination. Once configured successfully, I can run the proxy while keeping port 443 for Caddy.

Installing VLESS and Caddy

You can install VLESS directly using the v2fly/fhs-install-v2ray one-click script:

1
2
# Install executable and .dat data files
bash <(curl -L https://raw.githubusercontent.com/v2fly/fhs-install-v2ray/master/install-release.sh)

For installing Caddy, please refer to the official tutorial. For example, if I use Debian 12, I would use the following commands:

1
2
3
4
5
sudo apt install -y debian-keyring debian-archive-keyring apt-transport-https curl
curl -1sLf 'https://dl.cloudsmith.io/public/caddy/stable/gpg.key' | sudo gpg --dearmor -o /usr/share/keyrings/caddy-stable-archive-keyring.gpg
curl -1sLf 'https://dl.cloudsmith.io/public/caddy/stable/debian.deb.txt' | sudo tee /etc/apt/sources.list.d/caddy-stable.list
sudo apt update
sudo apt install caddy

Configuring VLESS

Edit /usr/local/etc/v2ray/config.json:

 1
 2
 3
 4
 5
 6
 7
 8
 9
10
11
12
13
14
15
16
17
18
19
20
21
22
23
24
25
26
27
28
29
30
31
32
33
34
35
36
{
    "log": {
        "access": "/var/log/v2ray/access.log",
        "error": "/var/log/v2ray/error.log",
        "loglevel": "warning"
    },
    "inbounds": [
        {
            "port": 1234,  // Any port
            "listen": "127.0.0.1",
            "protocol": "vless",
            "settings": {
                "clients": [
                    {
                        "id": "super-random-uuid",  // Replace with a randomly generated UUID
                        "level": 0,
                        "email": "example@example.com"
                    }
                ],
                "decryption": "none"
            },
            "streamSettings": {
                "network": "ws",
                "security": "none",
                "wsSettings": {
                    "path": "/"  // Must match the Caddy configuration later
                }
            }
        }
    ],
    "outbounds": [
        {
            "protocol": "freedom"
        }
    ]
}

Save and exit after editing.

Configuring Caddy

Create a Caddyfile in your preferred location, or edit an existing Caddyfile, adding the following content to reverse proxy the port set in the VLESS configuration file:

1
2
3
4
5
6
7
8
9
yourdomain.com {
        # Use a Matcher to match all WebSocket requests for the specified path
        @websockets {
                path /      # Must match the path in the VLESS configuration
                header Connection Upgrade
                header Upgrade websocket
        }
        reverse_proxy @websockets :1234
}

At this point, all the editing work for server configuration files are done.

Starting the Services

Start VLESS and set it to start on boot:

1
systemctl enable v2ray && systemctl start v2ray

Start Caddy or update the Caddy configuration:

1
2
caddy start
caddy reload  # Use to update the configuration

After completing all the above steps, the Caddy reverse proxy for VLESS is done.

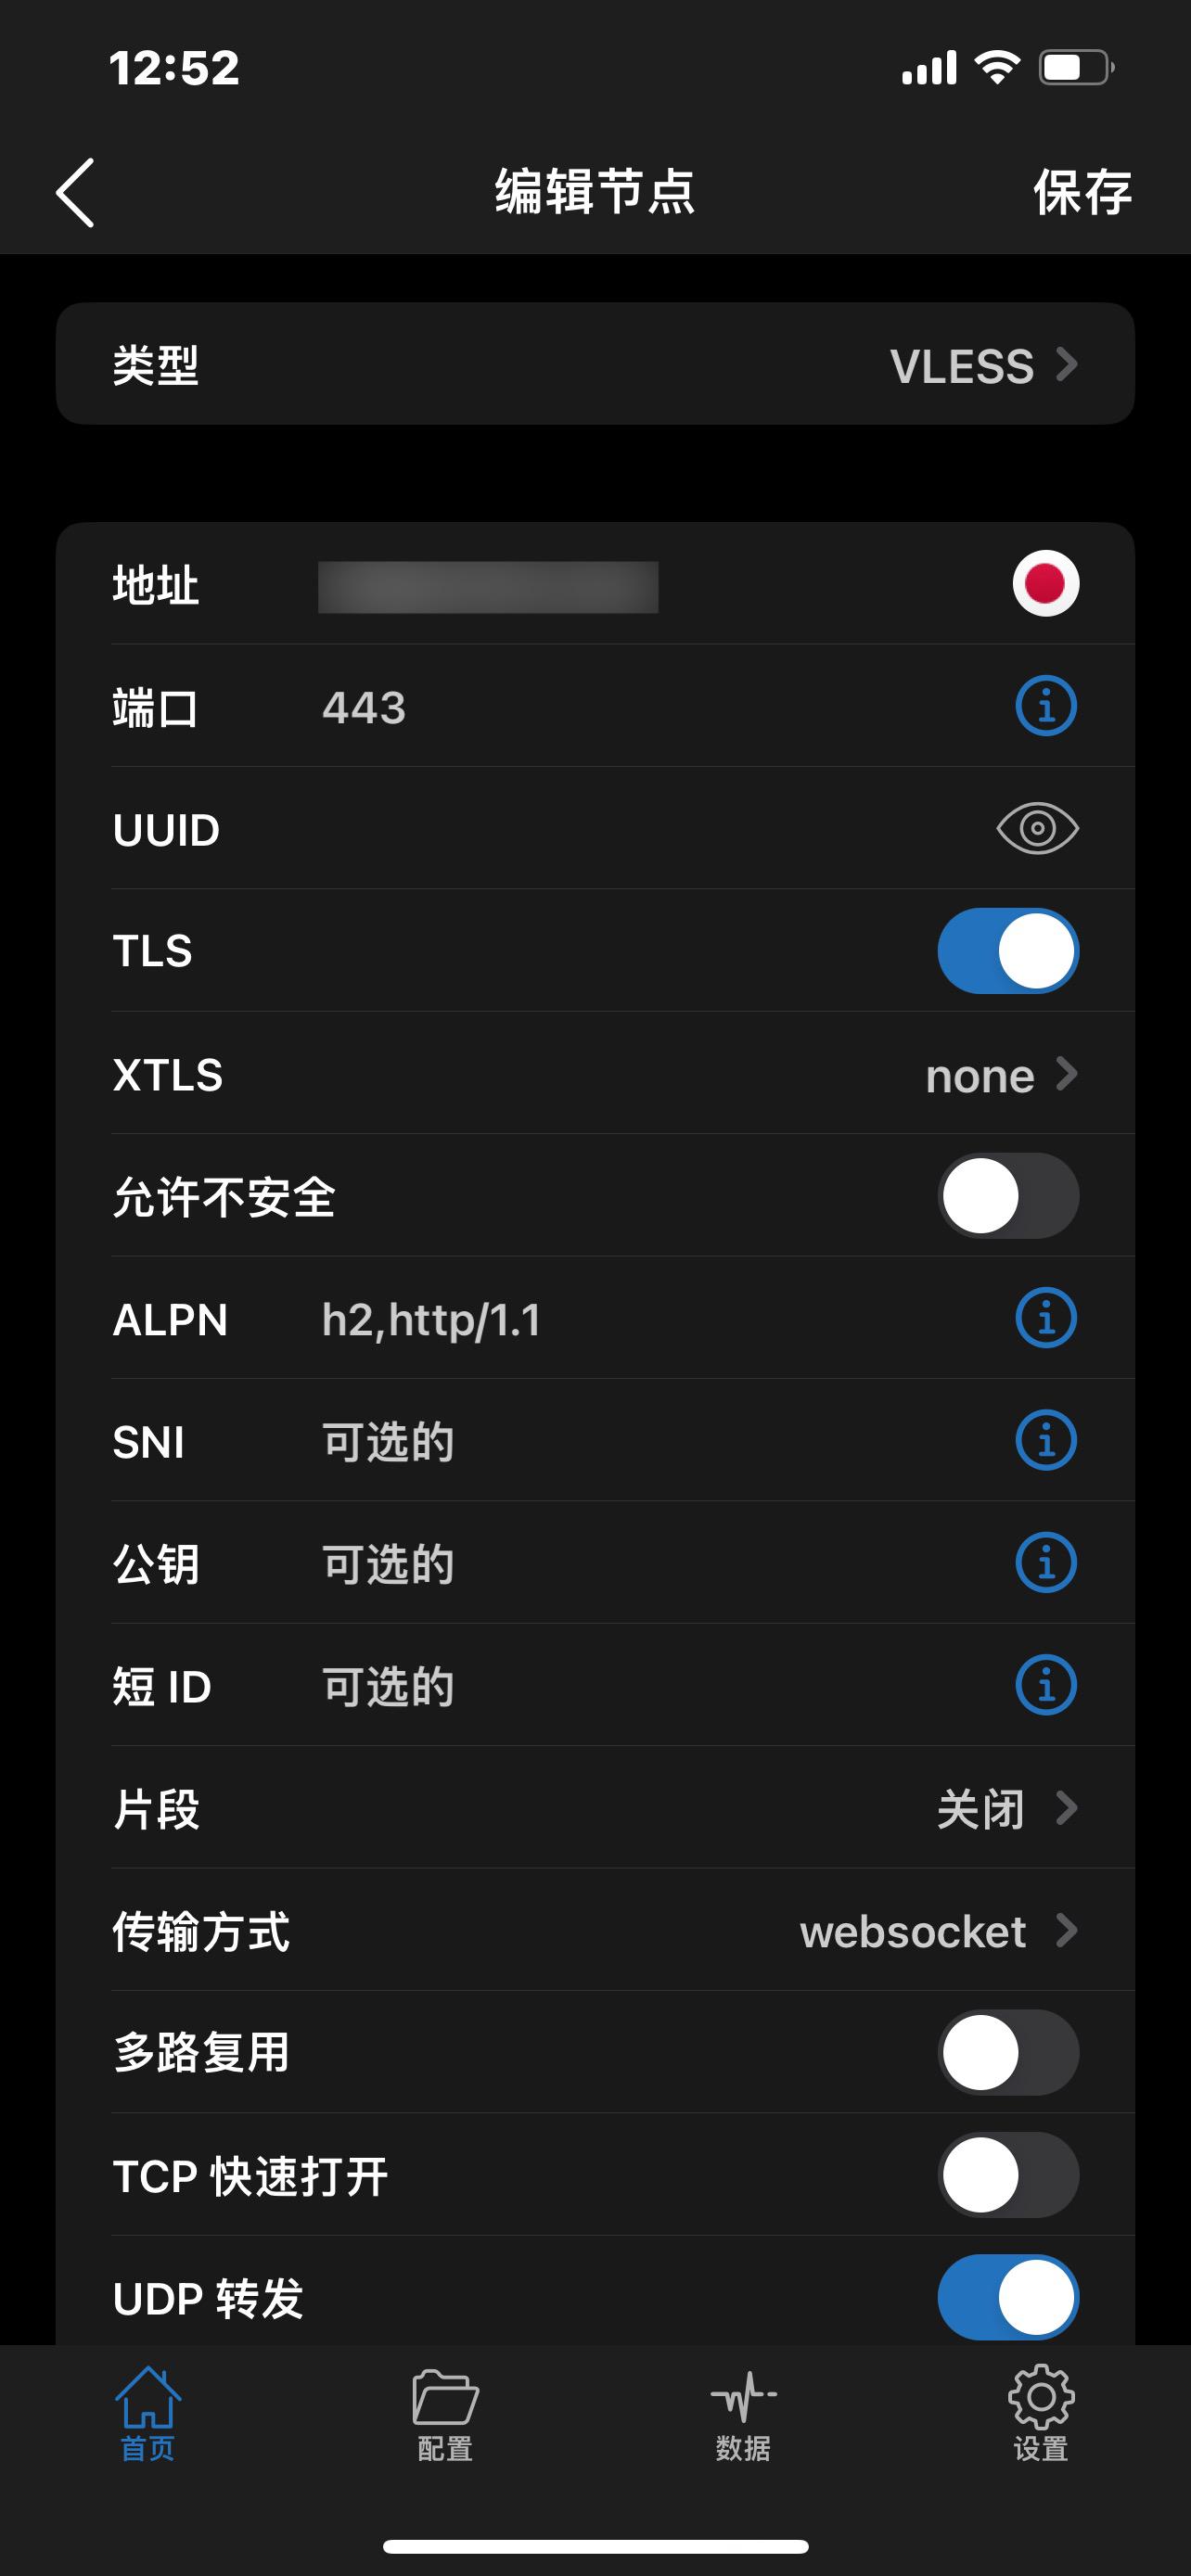
Client Configuration

Client settings need to be done manually:

  • The address should be the domain bound to VLESS.
  • The port should be 443.
  • TLS should be enabled.
  • The transport method should be WebSocket.
  • The UUID should be the one defined in the VLESS configuration file.

Shadowrocket Settings

Most client settings are similar. For Clash configuration files, you can refer to the Mihomo documentation1. Below is my example configuration file:

 1
 2
 3
 4
 5
 6
 7
 8
 9
10
11
12
13
14
15
16
17
18
19
20
21
proxies:
  - name: "A Random Name"
    type: vless
    server: yourdomain.com
    port: 443
    udp: true
    uuid: super-random-uuid
    flow: xtls-rprx-vision
    packet-encoding: xudp

    tls: true
    servername: yourdomain.com
    alpn:
      - h2
      - http/1.1
    skip-cert-verify: false

    network: ws

    smux:
      enabled: false

To generate a Clash configuration file, you can use the tool provided by V2RaySE.

Conclusion

Now we have a VLESS server, and Caddy will automatically apply for and maintain the TLS certificates for us, which is very convenient.

With just a little effort, I feel the same joy as when I used one-click scripts to set up SSR back in the day. Enjoy the excitement of being able to smoothly open google.com.

TODO List

  • Basic setup
  • Camouflage

  1. After all, Mihomo, inheriting the Clash Meta mantle, is considered the true successor of Clash. ↩︎

Licensed under CC BY-NC-SA 4.0
Built with Hugo
Theme Stack designed by Jimmy