One morning, I woke up to find an email in my inbox, notifying me of a login to my mailbox from South Korea. At first, I dismissed it, assuming it was just an occasional IP mismatch. However, over the following days, new alerts kept arriving, always from different IP addresses. It was clear something was wrong and if I didn’t act soon, there was a real risk my mailbox would end up being used for spam campaigns. I immediately removed the MX, SPF, and DMARC records from my domain and started looking for a more secure solution.
Initially, my plan was simply to change my email password, but after struggling to find the password-reset option in Tencent’s enterprise mailbox (it was truly well hidden!), I decided it was time to migrate my email hosting altogether and spare myself further hassle.
This is where this guide began: from the initial step of exposing the necessary firewall ports, to finally optimising deliverability. Here I share my experience setting up a mail server with docker-mailserver, so you can avoid some of the pitfalls I encountered.
Preparations Before Deploying docker-mailserver
Configuring Your Firewall
First, you’ll need to allow the standard email service ports through your firewall—specifically: 25, 143, 465, 587, and 993. The steps vary depending on your operating system, so consult the relevant documentation or AI tools if needed. For Ubuntu users with ufw, you can run:
| |
In my case, I use a combination of ufw and the setup outlined in To Fix The Docker and UFW Security Flaw Without Disabling Iptables. This means that if I want to expose Docker container ports to the outside world, I have to add some extra configuration.
| |
Checking if Your Server is Suitable
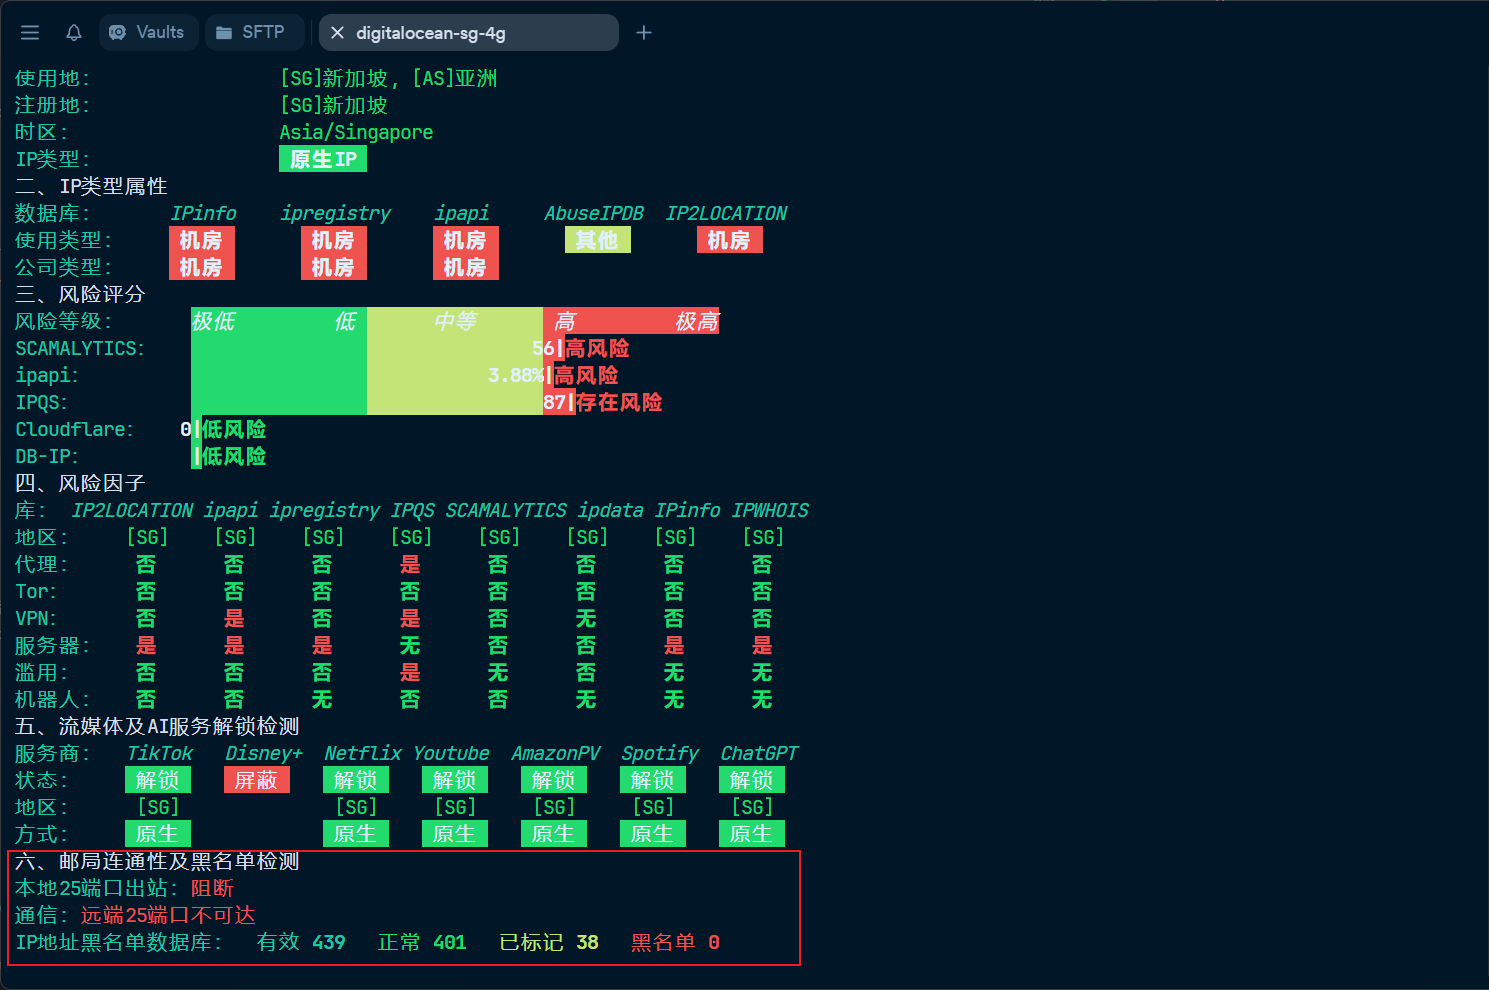
Not every server is suitable for running your own mail server—especially many of the cheaper options. Large email providers commonly blacklist IP addresses that have been associated with spam activity. If your hosting provider happens to allocate you one of these, any emails you send will get blocked, and it can be a painful process to discover and resolve this only after hours of configuration.
Even if your IP doesn’t appear on public blacklists, some hosting companies block outbound email ports to reduce the risk of abuse.
To check that your server meets the necessary requirements for running a mail server, use the following script (This script is in Chinese and also contains ads. If you mind, you can check your server IP on services like Scamalytics instead.):
| |
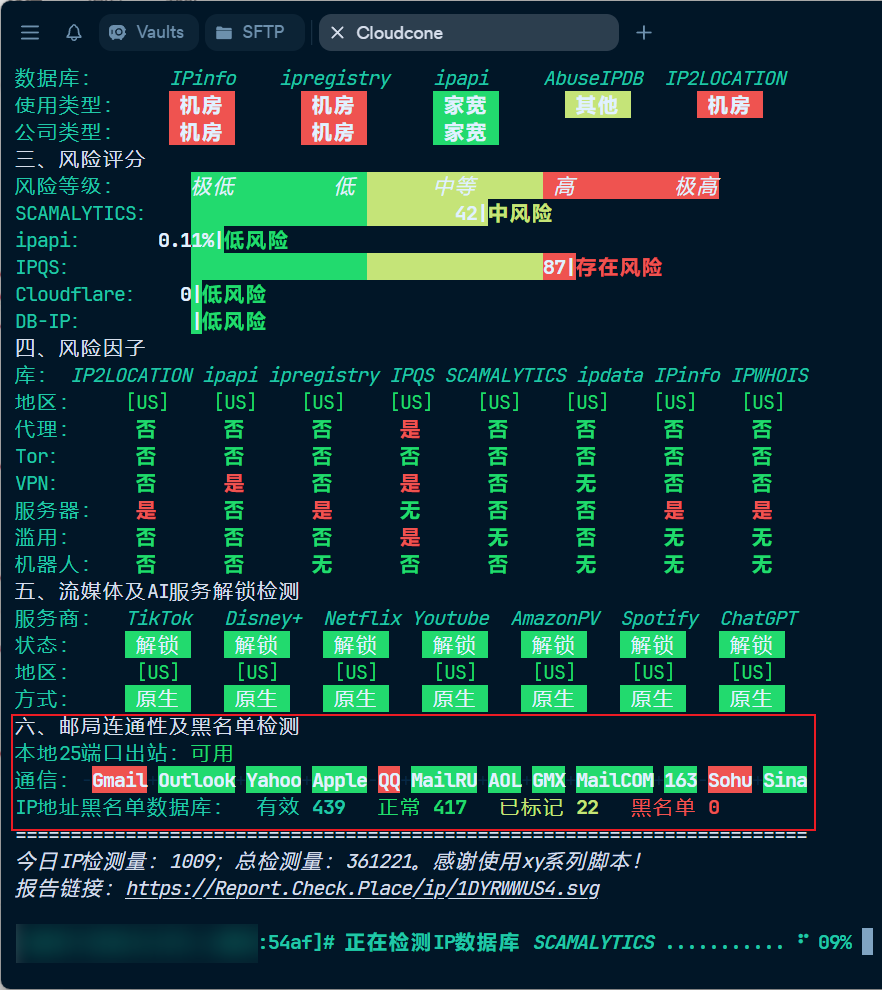
If you find your server is unsuitable or cannot run docker-mailserver (due to blocked ports or a tainted IP), it’s best to cut your losses and find a cleaner, less restricted IP address from a different provider.
Setup Guide
Downloading Configuration Files
docker-mailserver requires two main configuration files: compose.yaml and mailserver.env. Fetch them as follows:
| |
Tweak the configuration as needed. Here’s a snippet of settings I modified:
| |
Using Caddy to Obtain and Maintain TLS Certificates Automatically1
Since I already use Caddy as my reverse proxy/web server, I decided to let it handle all certificate management for the mail server as well. According to the official documentation, all you need to do is define a relevant subdomain in your Caddyfile, and Caddy will automatically obtain and renew its certificate:
| |
After I updated the DNS records, I found that my situation was rather unique in practice: my server wasn’t actually using Caddy’s automatic certificate issuance feature, but was instead configured with a wildcard Cloudflare Origin Certificate valid for 15 years. Even if I didn’t specify a certificate file for this particular subdomain, once Caddy loaded the wildcard certificate, it assumed there was no need to obtain a new one. This was rather awkward, as with Caddy you can only choose between using the Cloudflare Origin Certificate or running a mail server – not both simultaneously.
I ended up installing dns.providers.cloudflare and gave up on the Cloudflare Origin Certificate, allowing Caddy to automatically obtain and manage TLS/SSL certificates for each subdomain. Since the process is all automated, it saves me the headache and keeps things tidy:
| |
Finally, map Caddy’s certificate storage location into your docker-mailserver container:
| |
If Caddy runs as the root user, certificates will be stored in /root/.local/share/caddy/certificates/acme-v02.api.letsencrypt.org-directory/yourdomain.tld/—adjust as necessary.
Since we’re mapping the certificate path inside the container as /certs/, the config is as follows:
| |
First Launch
When you first start the container, you need to create a new Postmaster account within 120 seconds:
| |
Deliverability Optimisation
DNS Records
- An A record for your mail server (e.g.
mail) pointing to your server’s IP address (on Cloudflare, set to “DNS only”). - An MX record for the root domain (
@), pointing tomail.yourdomain.tld. - A TXT record (SPF) for the root domain (
@). You can generate an SPF record here (optional). - A TXT record (DMARC) with the name
_dmarc; you can generate this using this tool (optional). - A TXT record (DKIM) named
mail._domainkey—instructions on how to set this up follow below (optional).
DKIM, SPF, and DMARC2
So, what are DKIM, SPF, and DMARC? To put it simply:
- DKIM is a digital signature for your emails.
- SPF is like an “approved sender list,” declaring which mail servers can send emails on your behalf.
- DMARC instructs receiving servers how to handle emails that fail DKIM or SPF checks.
For a more in-depth explanation, see Cloudflare’s introduction.3
To set up DKIM, generate a key pair on your server:
| |
You’ll find the generated files in the mapped directory: ./docker-data/dms/config/opendkim/keys/.
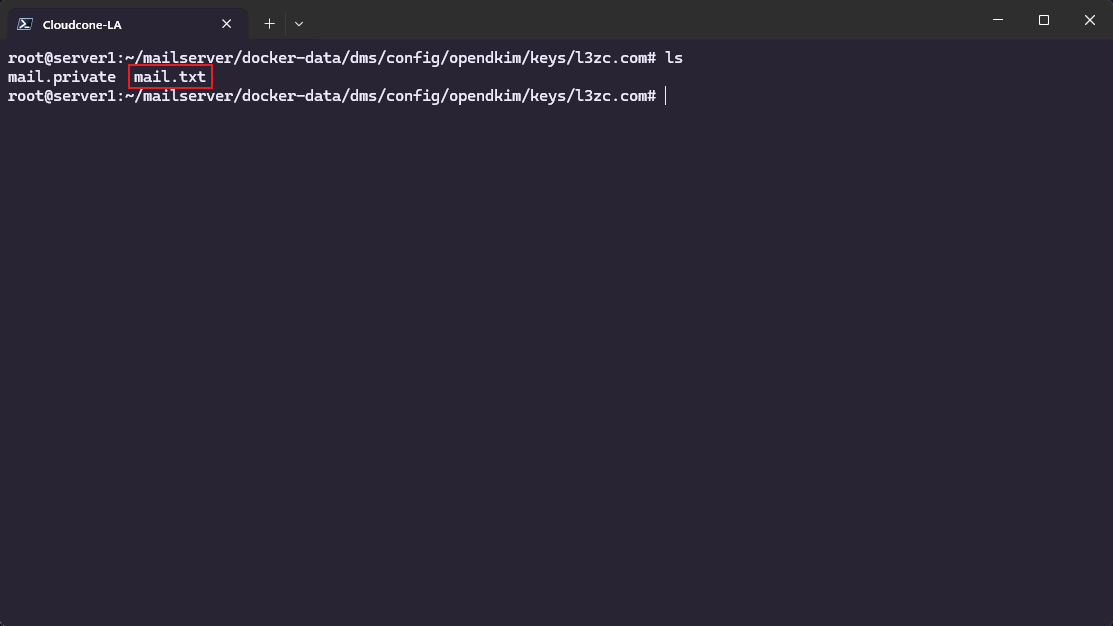
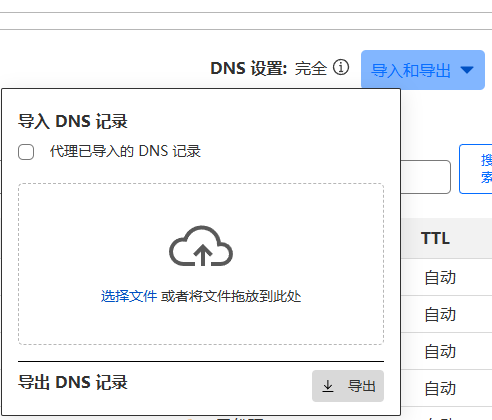
Download mail.txt (or copy all its contents into a file locally), then import it via your DNS provider’s dashboard to set up DKIM. Remember: you must restart your docker-mailserver container for changes to take effect4.
| |
As previously mentioned, SPF is your “authorised sender” list. If you only have a single mail server, your DNS TXT record should look something like:
| |
DMARC can be generated with one of the online tools linked above. Many DNS providers (like Cloudflare) also offer guided wizards to make DNS setup even easier.
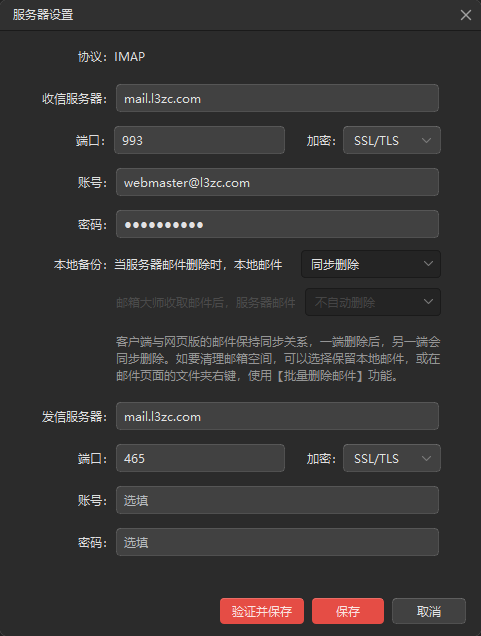
Client Setup
This part is straightforward: use mail.yourdomain.tld for both your IMAP and SMTP servers.
Enable SSL; the standard ports are 993 (IMAP SSL) and 465 (SMTP SSL). Log in with your credentials.
Make Use of MailTester
Congratulations—we’ve now reached the end of this docker-mailserver deployment! Before you start sending real emails, test your configuration with MailTester. A score of 10/10 means your emails have an excellent chance of landing in inboxes—enjoy your setup!
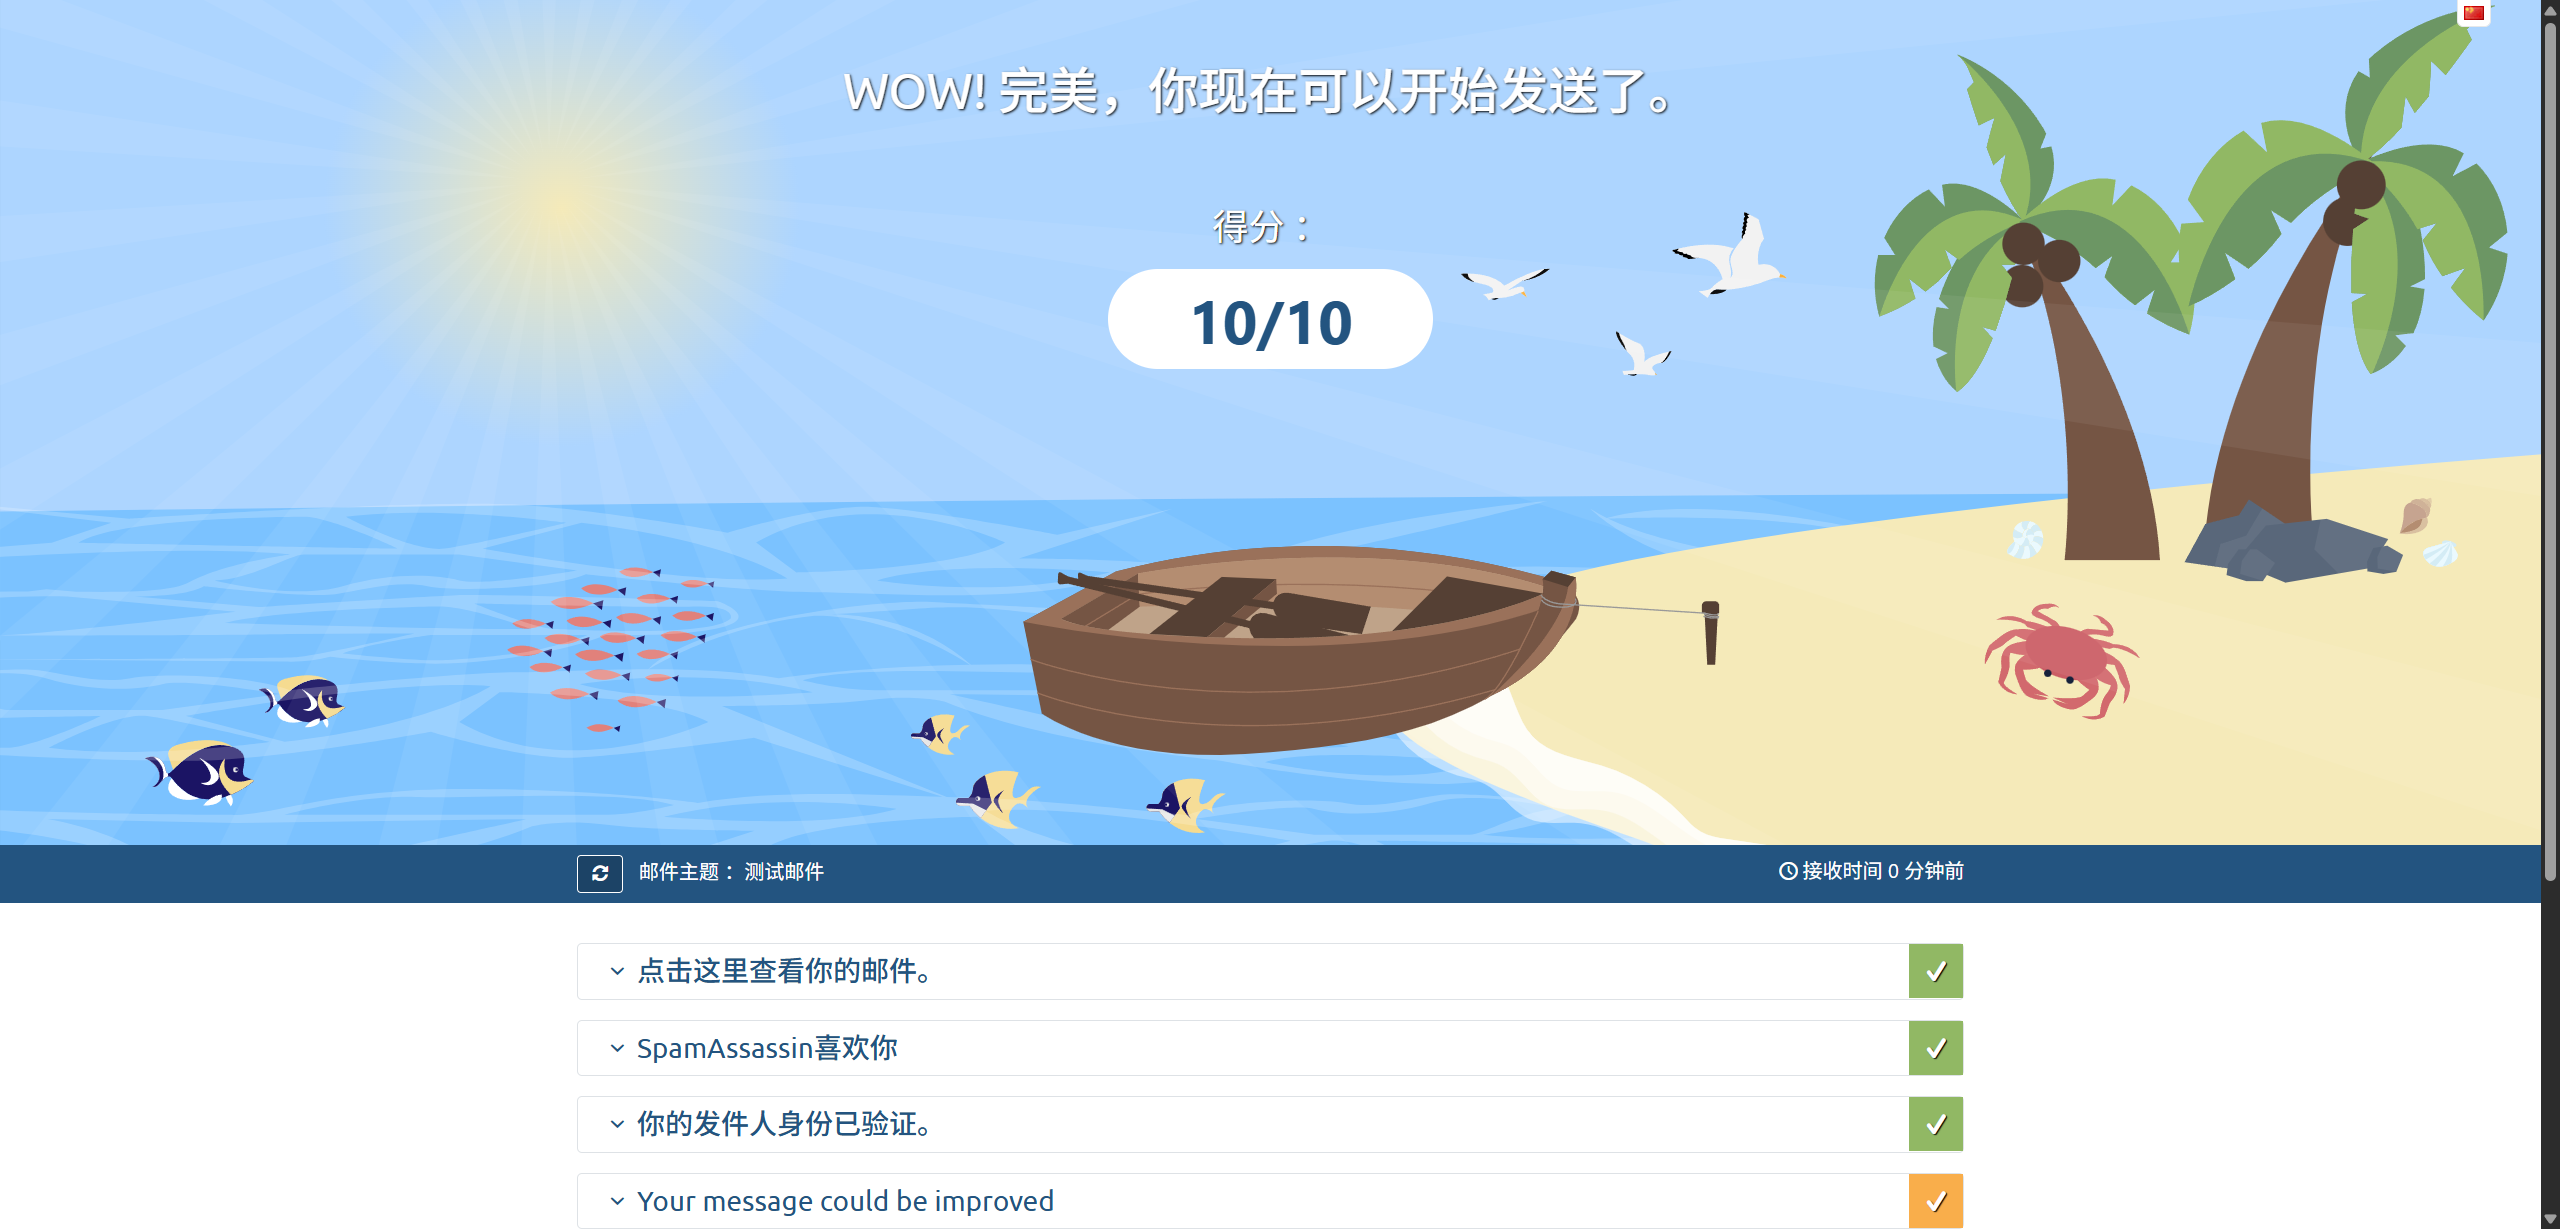
If you don’t get a 10/10 first time, don’t worry—carefully check any issues reported and work through them one by one.
TODO List
- Add a WebUI
Reference: https://docker-mailserver.github.io/docker-mailserver/latest/config/security/ssl/#caddy ↩︎
Reference: https://docker-mailserver.github.io/docker-mailserver/latest/config/best-practices/dkim_dmarc_spf/ ↩︎
For a deeper dive: https://www.cloudflare.com/learning/email-security/dmarc-dkim-spf/ ↩︎
See the official documentation for details. ↩︎
Comments are disabled until you accept functional cookies.