After taking advantage of the Spring Festival promotions to subscribe to multiple VPN services, the challenge of making the most out of each node became a problem that was neither too difficult nor too simple. I could, of course, subscribe to the configuration files provided by each VPN service and switch between them, but that would be too cumbersome. Moreover, I also have self-built nodes, and I don’t want to create a new configuration just for one node.
Sub-Store solves this problem effectively. It can extract node information from multiple subscriptions, organise them using regular expressions or JavaScript, and finally output a consolidated subscription containing all the node information.
To deploy it, you can directly use the image packaged by xream. This image integrates both the frontend and backend. If deploying on a public network, remember to change the backend path; otherwise, your configuration files might be misused.
| |
Reverse proxy port 3001 to access the Sub-Store frontend. Here’s an example using Caddy:
| |
Of course, don’t forget to add the backend address when you first enter the frontend. The backend address depends on the settings in the compose file. In this example, the backend address is https://sub-domain.example.com/super-random-path.
Managing Combined Subscriptions
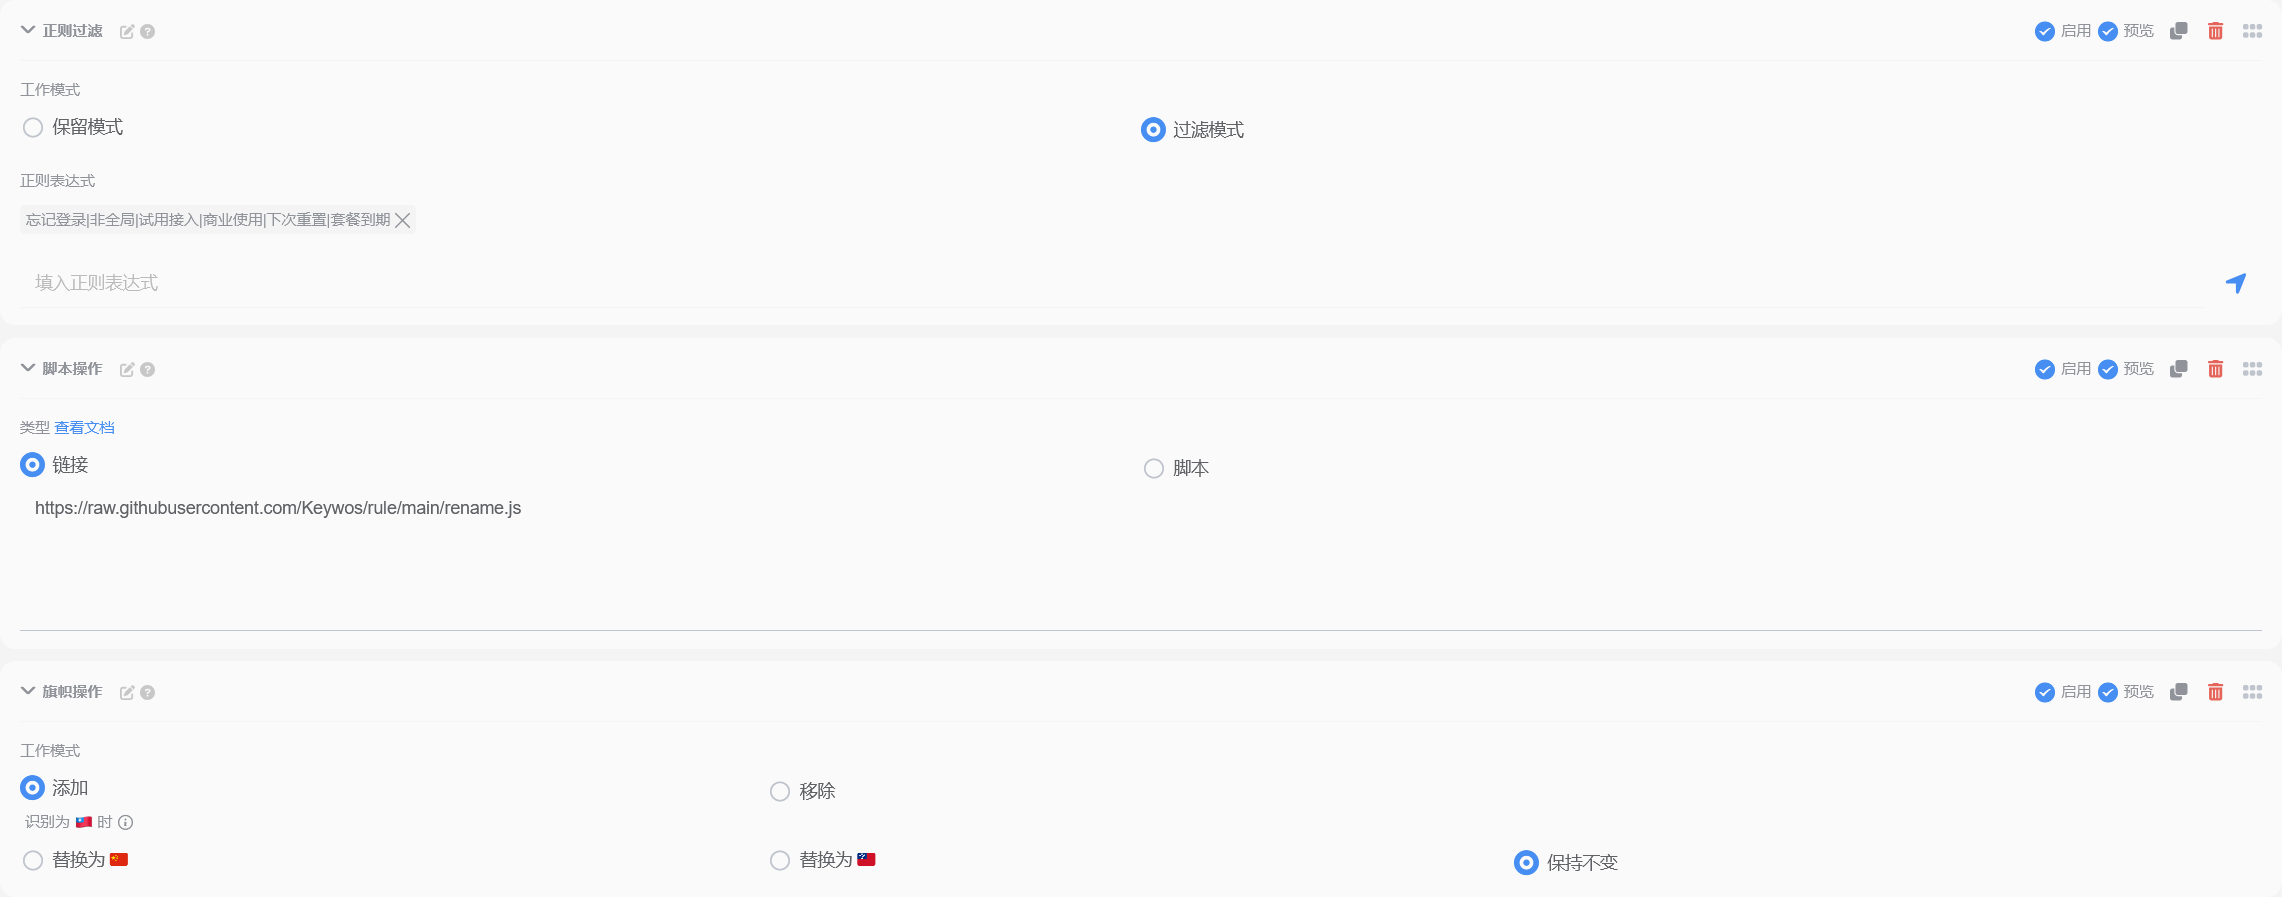
After adding all VPN services and self-built nodes, you can start combining them into a single subscription. However, the naming conventions for nodes across different VPN services are varied, making the list look messy by default. There’s even a possibility of nodes from different services having the same name. Fortunately, Sub-Store has a feature to batch rename nodes using scripts. Here’s a recommended script that can help rename all VPN nodes.
To use this script, simply paste the following address into the script operation section when editing the subscription.
| |
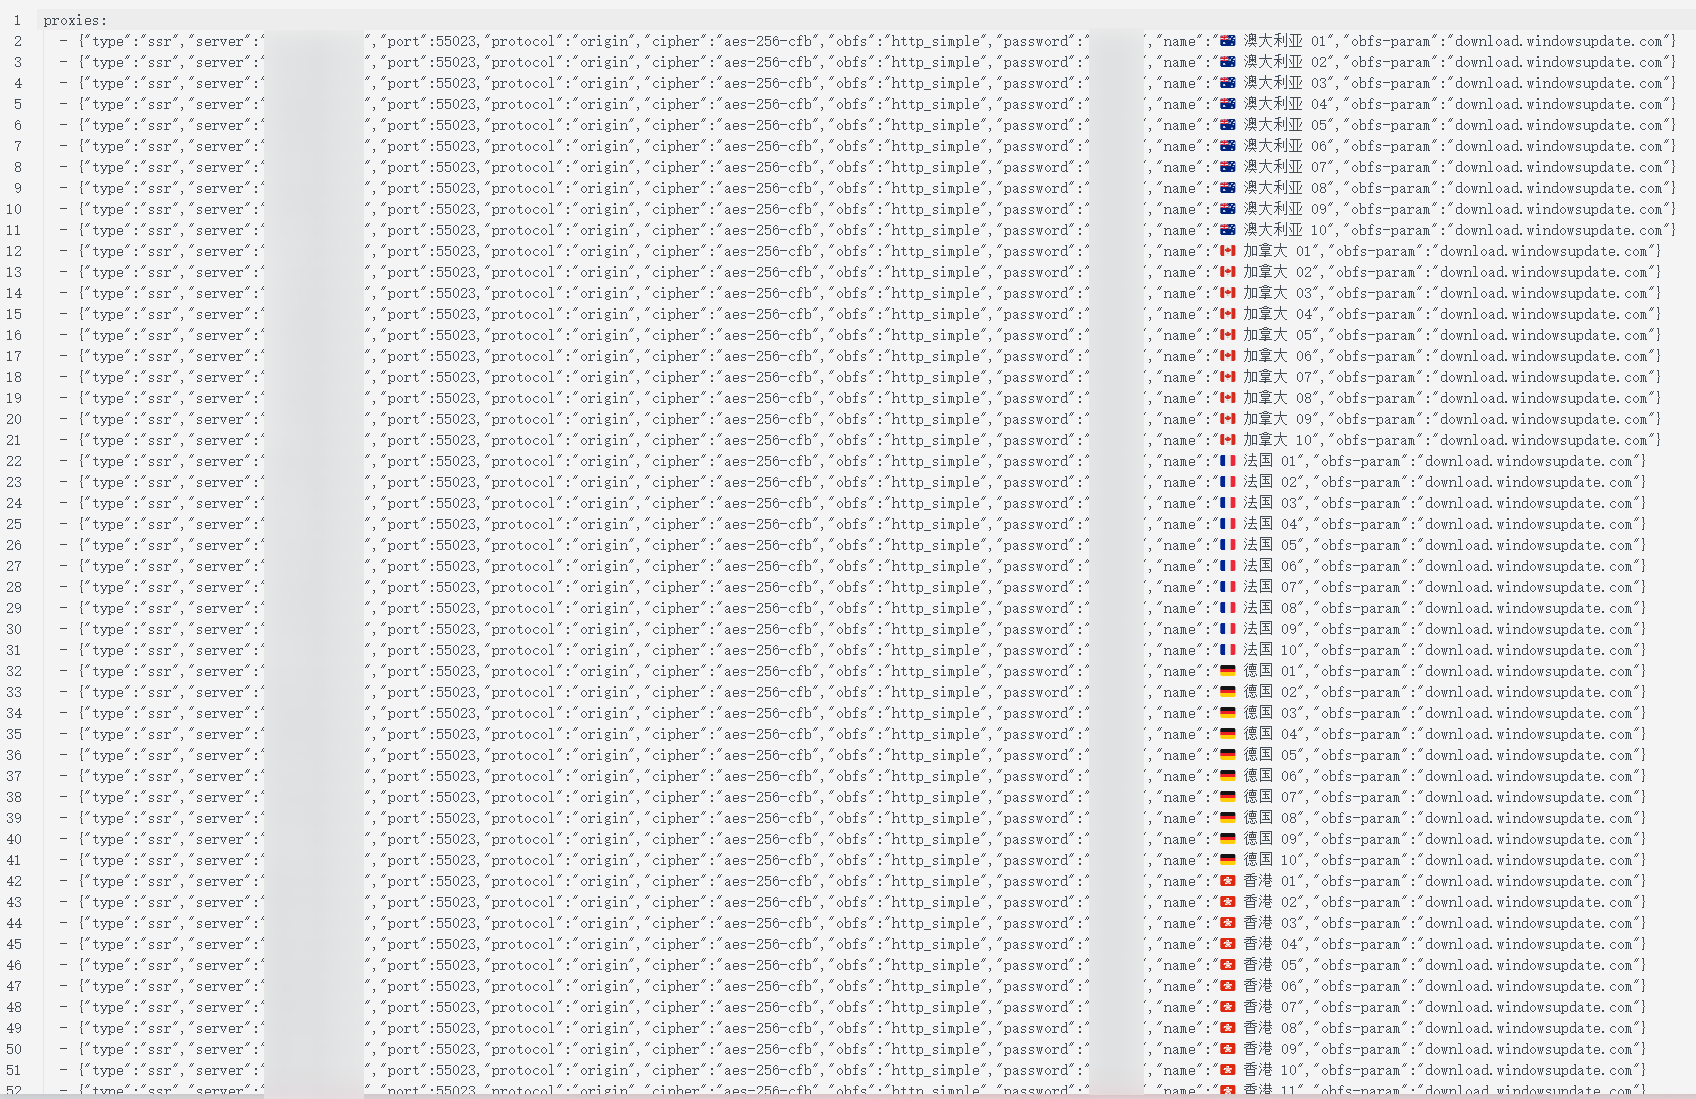
After performing some node operations you prefer, you can organise a standardised node list.
Generating Clash Configuration
Although we now have a node list, the generated configuration file does not include any rules. You need to write your own or pull third-party rules.
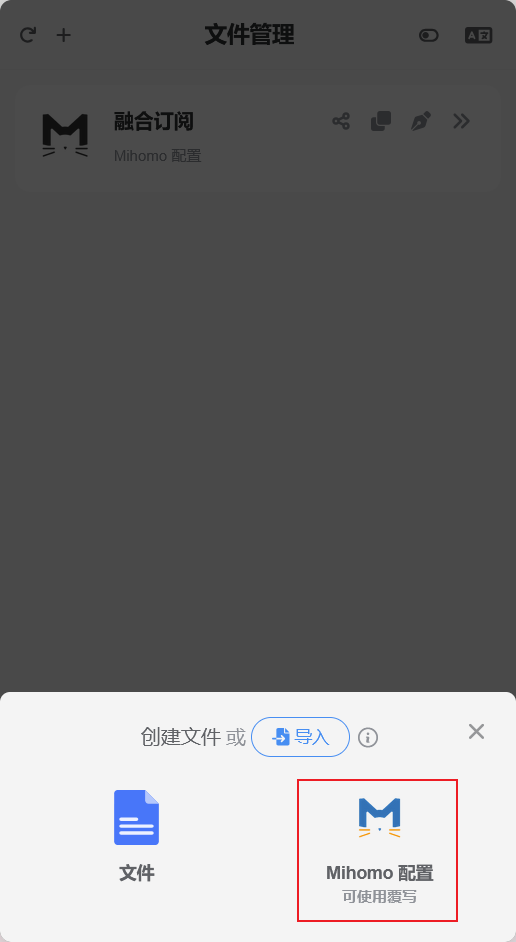
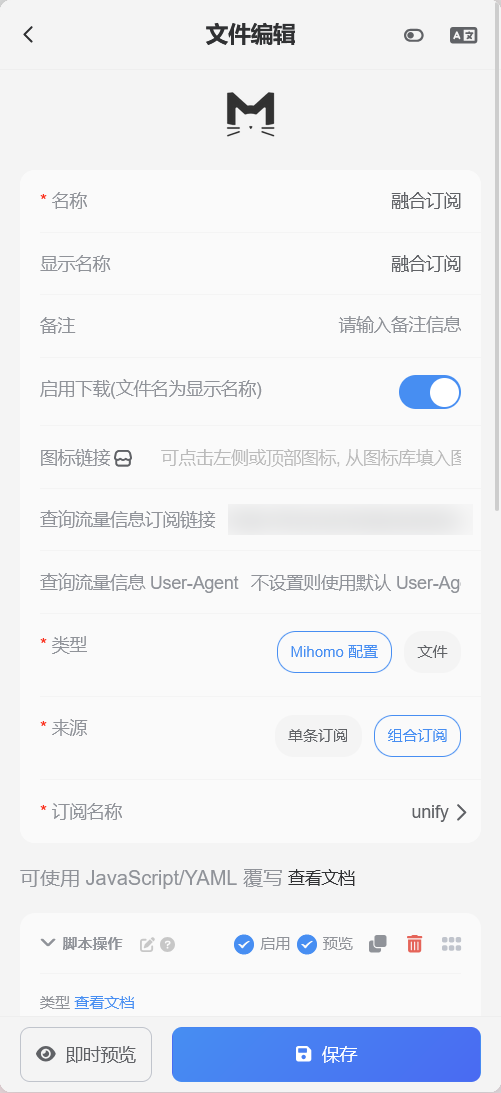
Go to Sub-Store’s file management and create a new Mihomo configuration:
- For “Source,” select the combined subscription and choose your subscription group.
- In the script operation, fill in your override configuration.
Here, I recommend my own override rules powerfullz/override-rules, forked from mihomo-party-org/override-hub. Compared to the original ACL4SSR rules in the repository, the following improvements have been made:
- Integrated SukkaW/Surge rule sets, optimising ad blocking, privacy protection, and traffic routing accuracy.
- Added practical routing rules for Truth Social, E-Hentai, TikTok, and cryptocurrencies.
- Removed redundant rule sets.
- Includes DNS and Sniffer configurations.
- Introduced the full version of Loyalsoldier/v2ray-rules-dat GeoSite/GeoIP database.
- Added no-resolve parameters for IP rules to avoid local DNS resolution, improving internet speed and preventing DNS leaks.
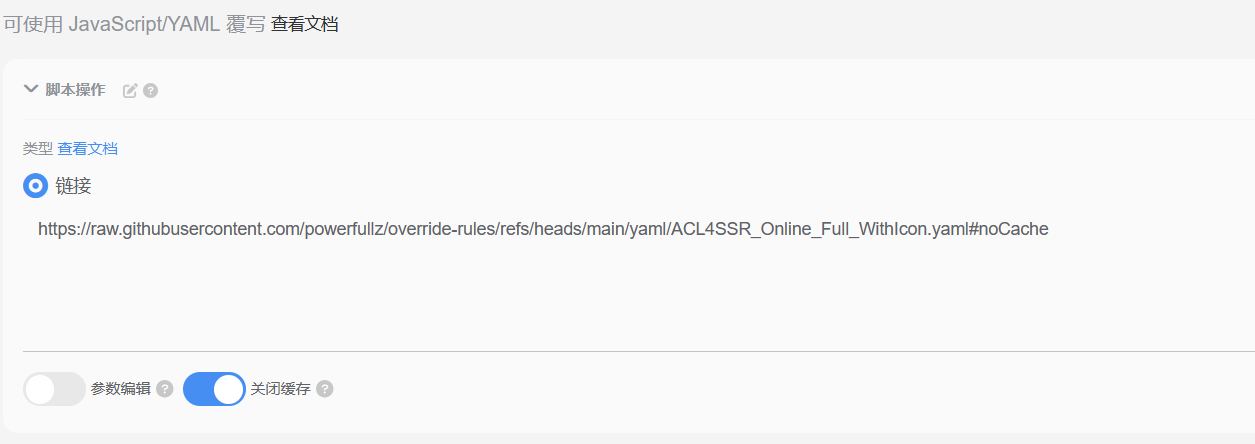
Create a new script operation and paste the rule Raw link https://raw.githubusercontent.com/powerfullz/override-rules/refs/heads/main/override.yaml.
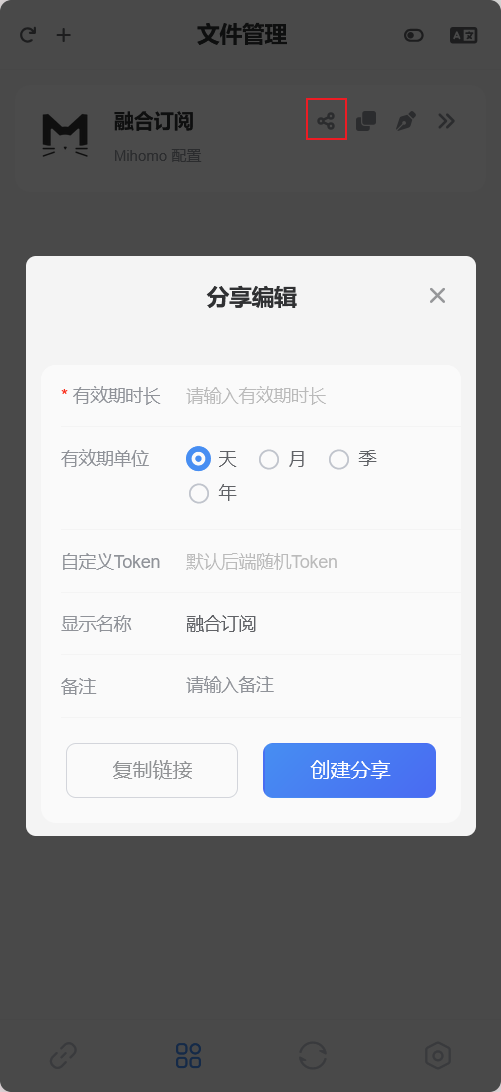
After saving successfully, click the share button to generate a share link. Set the share validity period and click “Create Share.” The generated link is the final Mihomo configuration file. Use it as a subscription link in your proxy software, and you’re all set.
Comments are disabled until you accept functional cookies.